Preparing the defibrillator

The first step in preparing the defibrillator is to ensure that it is set to deliver a synchronised shock. An unsynchronised shock could coincide with a T wave and cause ventricular fibrillation (VF). By avoiding the relative refractory period, the risk of inducing VF is minimised.
Select Start to begin.
You should ensure that you give a shock of the correct energy to your patient, preferably a biphasic shock unless only monophasic equipment is available:
For a broad-complex tachycardia or atrial fibrillation, start with a 120 - 150 J biphasic shock (200 J monophasic) and increase in increments if this fails.
Select More to continue.
Atrial flutter and regular narrow-complex tachycardia will often be terminated by lower-energy shocks: start with 70 - 120 J biphasic (100 J monophasic).
Select More to continue. pad positions for external pacing.")
For patients who are in atrial fibrillation or atrial flutter, use anteroposterior self-adhesive pad positions when it is practicable to do so.
Select More to continue.
When delivering the shock, press the shock button and keep it pressed until after the shock has occurred – there may be a slight delay before the shock is delivered. If further shocks are needed, reactivate the synchronisation switch before each shock if necessary.
Select Restart to play the animation again or select Next to continue.


References

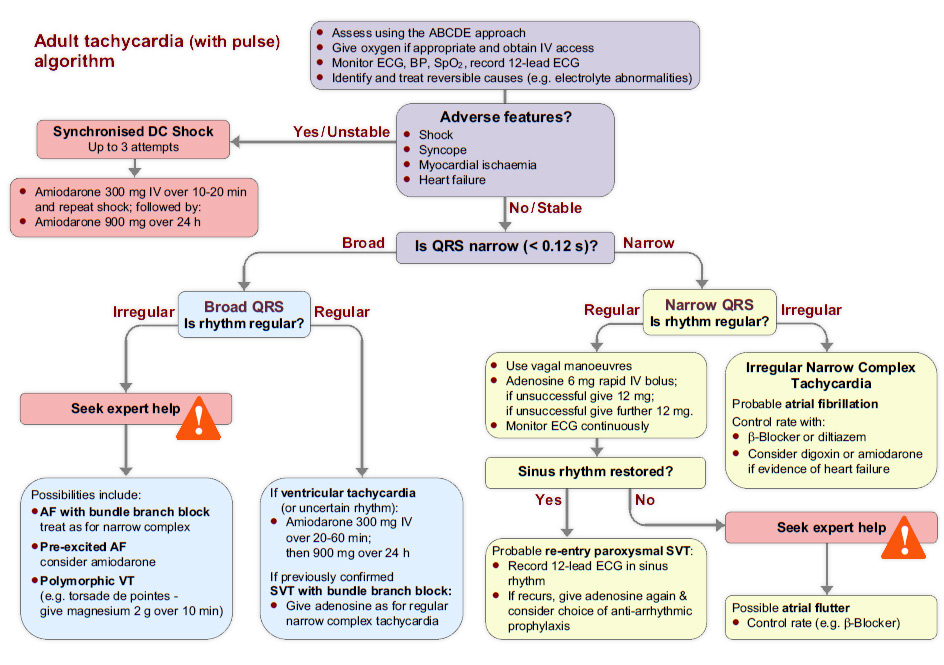
See chapter 11 of the ALS manual for further reading about the tachycardia algorithm.

The tachycardia algorithm